216
WORKING WITH 5.1 SURROUND CHP. 12
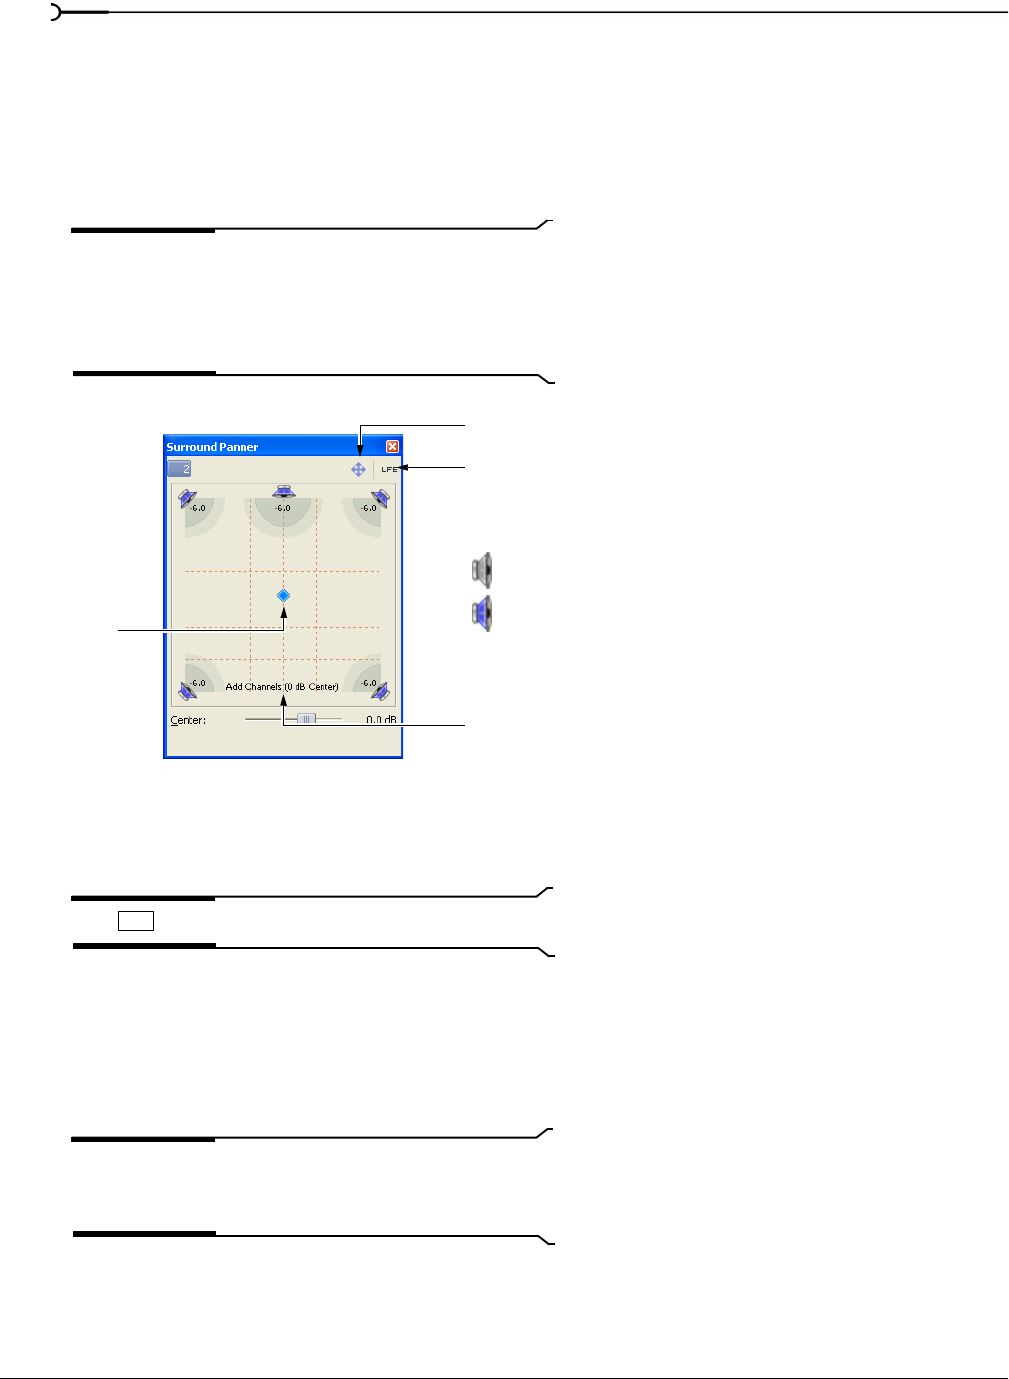
Using the Surround Panner window
Whether you’re adjusting track panning or mixer control panning, you use the same controls in the
Surround Panner window.
View the Surround Panner window by double-clicking a surround panner on a track header or mixer control.
Once the Surround Panner window is open, you can dock it in the workspace. For more information, see
Window docking area and floating window docks on page 24.
Tip:
You can also choose Surround Panner from the View
menu to display the Surround Panner window. Once the
Surround Panner window is displayed, double-click the
surround panner for a track or mixer control to view its pan
settings.
1.
Click the speaker icons to mute or include channels.
Muting a channel ensures that no audio bleeds through a channel. For example, you might want to mute
all but the center channel when you’re panning dialogue to the center channel.
Tip:
+ click a speaker icon to solo the channel.
2.
Drag the pan point to position the sound within the sound field. For more information, see Moving the pan
point on page 217.
3.
Click the center speaker icon to include the center channel and drag the Center fader to apply a gain to
the center channel.
Applying a gain to the center channel may make dialogue more present in the mix.
Note:
When automating panning using keyframes, you
cannot automate the gain applied using the
Center fader. For
more information, see Automating panning on page 218.
4.
Drag the Smoothness slider to adjust the smoothness of the interpolation path between panning
keyframes. The smoothness setting appears only when you are automating panning using keyframes. For
more information, see Adjusting the Smoothness slider on page 220.
Pan point
= Muted channel
= Active (included) channel
Toggle options for constraining
Assign track/bus to LFE channel
pan point movement
Pan type indicator
Ctrl


