


CHP. 3 USING THE MEDIA MANAGER
91
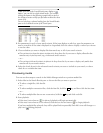
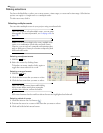
Adding custom columns
You can add custom columns to the Search Results pane to store additional information about media files.
When you add custom columns, they are added to the current library only.
For example, if you wanted to keep track of which removable hard drive contained a media file, you could
create a custom
Drive Number column to assign any numeric rating to a media file. You could then use the
Advanced section of the Search pane to search using the
Drive Number value.
When adding media to a library, you can choose to add this information by selecting the Add tags and custom
columns from files
check box in the Add Files to Media Library dialog.
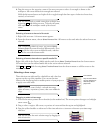
1.
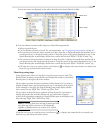
Right-click the column headings and choose Custom Columns from the shortcut menu. The Custom
Columns dialog displays.
2.
Click the Add New Column button ( ) to add a custom column. A new entry is added to the list.
3.
In the Name box, type the name you’d like to display as a column heading.
4.
Select the Typ e box and choose Text or Integer from the drop-down list to indicate whether you’ll store text
or numeric data in the column.
5.
If you want to remove a custom column, select an entry in the list and click the Delete Selected Columns
button ( ). The column and all data stored in the column is removed from the library.
6.
Click the OK button. The column is added to the media library, and the Search Results pane is scrolled to
the right to display your new column.
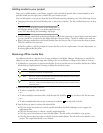
Editing a column’s contents
Some columns in the Search Results pane can be edited. When an entry in the Search Results pane is
selected, click a box to make it editable. You can then type new information in the box.
Changing a column’s contents affects only the entry in the current media library. Click the Save Tags and
Properties to Files
button ( ) to save the properties with the media file.
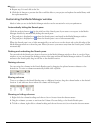
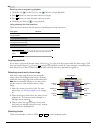
Showing thumbnails
If you’re working with videos or still-images, the thumbnail view helps you see the files that match your
search criteria.
To switch to thumbnail view, click the down arrow ( ) next to the Change Search Results View button ( )
and choose
Thumbnail.
You can drag the slider at the bottom of the Search Results pane to adjust the size of the thumbnails.
When you select a file, the thumbnail is magnified. You can change the zooming behavior on the
Thumbnail tab of the Media Manager Options dialog.
You can choose which frame you want to use as a thumbnail for video files:
1.
Right-click a thumbnail in the Search Results pane and choose Choose Thumbnail from the shortcut menu.
The Thumbnail Chooser dialog is displayed.
2.
Drag the slider in the Thumbnail Chooser dialog to set the frame you want to use.
3.
Click the OK button.