


CHP. 2 GETTING STARTED
57
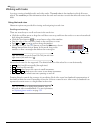
Double-clicking a media file
This method places the event at the cursor’s position in the selected track. If the selected track is a video
track, and you double-click an audio event (or vice versa), a new track is created for the event. Once an
event is placed, you can move it from one track to another or change its position on the timeline.
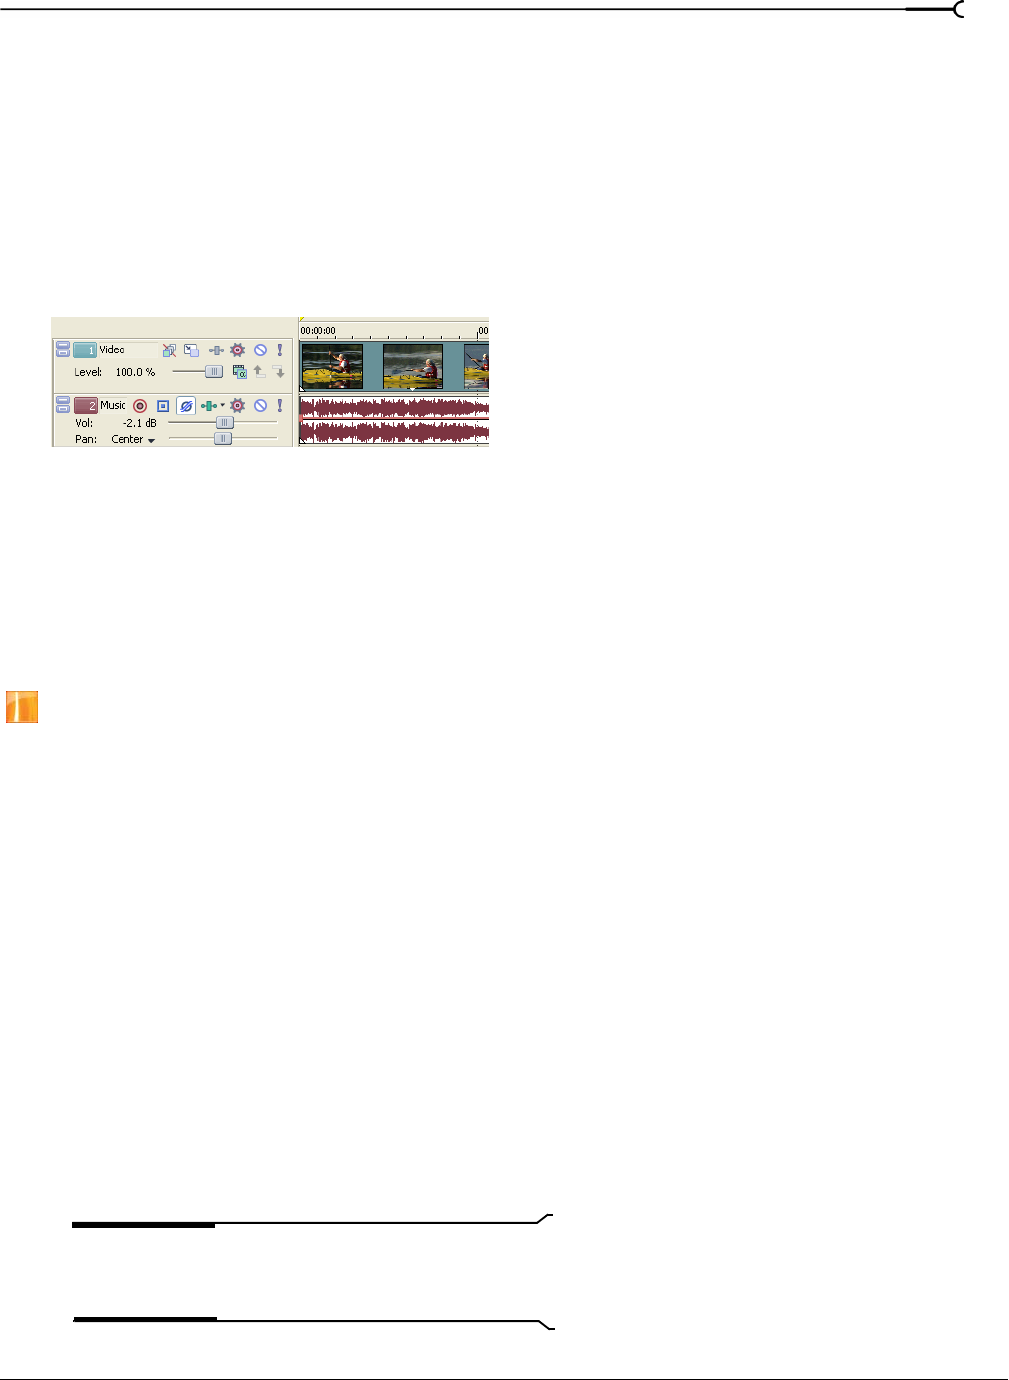
Inserting a video file with associated audio
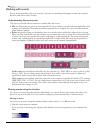
Media files with video frequently include associated audio. When you insert a media file into the timeline,
the associated audio is automatically inserted into a separate audio track below the video track. The two
associated events are grouped together and behave as a single unit when moved or otherwise edited. You can
ungroup the events to move them independently. For more information, see Clearing a group on page 180.
Automatically crossfading inserted events
When inserting multiple events across time, the events (both video and audio) may be set to automatically
crossfade. Two options must be enabled in order to create crossfades automatically when adding multiple
events. First, verify that a check mark appears next to
Automatic Crossfades in the Options menu. Second,
from the
Options menu, choose Preferences, and on the Editing tab, select Automatically overlap multiple
selected media when added
. For more information, see Using automatic crossfades on page 112.
Working with MXF files
This feature is available only in the full version of Vegas software.
The full version of Vegas software includes a full-resolution MXF reader for Sony XDCAM that allows you
to use full-resolution MXF files on the timeline.
You can use MXF files just like any other supported media type. We recommend the following workflow for
efficient editing.
1.
Copy the files from the XDCAM Professional Disc™ to your local hard drive:
a.
Set up your XDCAM device as a drive that your editing computer can access. Please refer to your
XDCAM device documentation for specific setup information.
b.
Using the standard Windows file-copy procedures, copy the entire contents of your XDCAM
Professional Disc(s) to your local hard drive.
2.
Add the MXF files to the Vegas timeline:
a.
Using the Vegas Explorer window, navigate to the Clip folder where you copied your MXF files in step
1.
b.
Select the MXF files you want to use in your project.
c.
Drag files to the timeline to create events.
MXF files will behave like any other piece of media in a project.
Note:
Essence markers from the MXF files are displayed as
named media markers (media markers are visible in the
timeline events and in the Trimmer window).
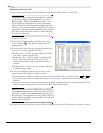
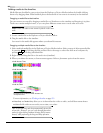
Two events that contain the video (top)
and audio (bottom) streams from a single
multimedia video file; each event is
inserted on a separate track.