


314
SAVING, RENDERING, AND PRINTING PROJECTS CHP. 17
Create an OpenDML (AVI version 2.0) compatible file
Select this check box if you want to save your file as an OpenDML file. OpenDML files allow you to create
files that are limited in size only by the format of your hard disk: 2GB using FAT32 or 4GB using NTFS.
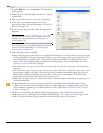
Audio tab
Include audio
Select this check box to include the audio stream and enable the remaining fields on the dialog. If you do not
want to include the audio stream, clear this check box.
Audio format
This lists the audio rendering codecs that are available.
Attributes
If the codec you choose in the Audio format drop-down list supports it, select the appropriate attributes for the
codec from this list.
Sample rate
The sample rate directly affects the audio’s quality. The sample rate is defined as the number of times a
second that data is sampled in an audio file. It is similar to the concept of resolution in an image file. The
higher the setting you choose, the better the quality, but the larger the file size.
Bit depth
The bit depth directly affects the audio’s quality. The bit depth is defined as how much data is used to save
each sample. The higher the setting you choose, the better the quality, but the larger the file size.
Channels
You can render a project in either stereo or mono.
Exporting a movie to a PSP
This feature is available only in the full version of Vegas software.
If you want to render your project to Sony AVC/AAC format and transfer it to a USB-connected PSP™
(PlayStation® Portable) system, you can do this using the Vegas Export to PSP™ feature.
Note:
PSP firmware version 2.0 is required to use this feature.
To check your firmware version, choose Settings > System
Settings > System Information on the PSP. For the latest
firmware, go to http://us.playstation.com (in the United States)
or http://www.playstation.com (outside the United States).
Note
: If you’re using high-resolution video, choose Best
from the
Full-resolution rendering quality drop-down list on the
Video tab of the Project Properties dialog before exporting
your movie to prevent resizing artifacts.
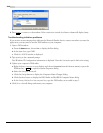
1.
Click in the timeline to position your cursor on the frame you want to use to represent your movie. This
image will be displayed as a thumbnail on the PSP™ navigation system.