CHP. 14 USING VIDEO FX, COMPOSITING, AND MASKS
259
Creating video masks
You can also use video files to create masks, although the process can be more complicated than using an
image as a mask. The key to any mask is contrast. You can increase the difference between the light and dark
areas of a video file using video effects plug-ins.
1.
Insert the video that you want to use as a mask into a video track.
2.
Drag a Black and White plug-in from the Video FX window to the event to remove the color. For more
information, see Adding a video effects plug-in on page 242.
3.
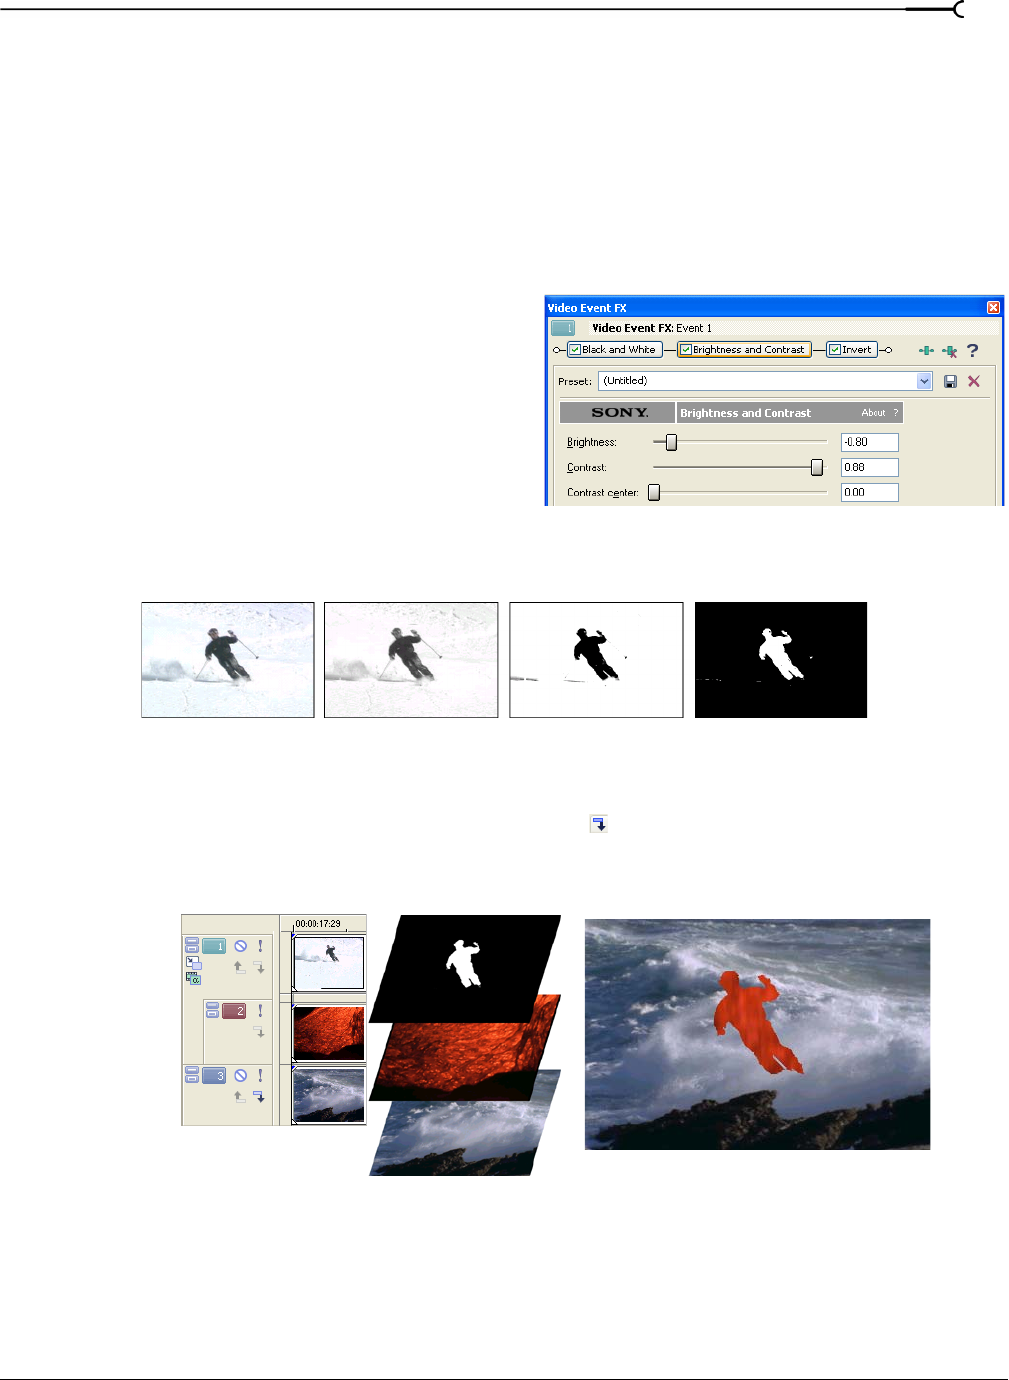
Drag a Brightness and Contrast plug-in from the Video FX window to the event.
4.
Adjust the Brightness and Contrast to create the
mask. Watch the Video Preview window for a real-
time preview of the mask. Adjust the effect so that
parts of the video are completely black (opaque)
and other parts are completely white (transparent).
This can often mean increasing the contrast while
decreasing the brightness.
5.
If necessary, mask areas can be inverted (reversing
the black and white areas) with an Invert plug-in
or by selecting the
Invert check box in the Mask Generator window. For more information, see Using the
Mask Generator on page 263.
After you have created the mask, place it in the highest track. Add another video event to another track
below the mask and click the
Make Compositing Child button ( ) on that track. Any video that appears in a
lower track below the Parent mask track and its Child shows through the areas outside of the mask. The
entire setup is pictured in the following illustration.
Original color event
Black and White Invert plug-in
Brightness and Contrast
plug-inplug-in
Mask track
Masked video
Background
(Parent)
(Child)


