


64
GETTING STARTED CHP. 2
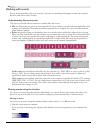
Using the track list
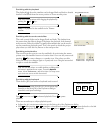
This section describes the different controls in the track header of each track. Some controls are specific to
either video or audio tracks.
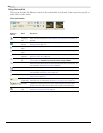
Video track header
Button or
Control
Name Description
Make
compositing
child
Creates a parent/child compositing relationship with the track above. Used when creating
masks. For more information, see Understanding the parent/child track relationship on
page 248.
Track number
and color
Track numbers and colors help organize a multitrack project. For more information, see
Managing tracks on page 141.
Minimize track
height
Minimizes track height. For more information, see Changing track height on page 143.
Maximize track
height
Maximizes track height. For more information, see Changing track height on page 143.
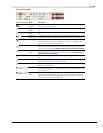
Expand track
keyframes
Displays track keyframes on the timeline. For more information, see Working with
keyframes in track view on page 276.
Bypass motion
blur
Bypasses motion blur envelope for a track. For more information, see Using video bus
tracks on page 152. Available only in the full version of Vegas software.
Track motion Track motion is used to move a video track across a background. Picture-in-picture
effects and scrolling title sequences are two simple cases where this tool is important. For
more information, see Adding track motion on page 281.
Track FX Adds track effects plug-ins. For more information, see Using video effects on page 241.
Mute Temporarily suspends playback of the track so that you can focus on other tracks. For
more information, see Muting a track on page 149.
Solo Isolates a track for playback by muting the other tracks. For more information, see
Soloing a track on page 150.
Track name
(scribble strip)
Allows you name a track. To name a track, double-click the scribble strip and type the
track’s name. For more information, see Naming or renaming a track on page 142.
Composite
level slider
Determines the opacity/transparency of the video track. Drag the slider to control the
transparency or blending of the track. Left is 100% transparent and right is 100%
opaque. You can also double-click the label to enter a specific numeric percentage.
Compositing
mode
Determines how the transparency in a video track is generated. For more information,
see Selecting compositing modes on page 249.