


CHP. 18 CUSTOMIZING VEGAS SOFTWARE
349
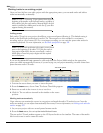
Editing tab
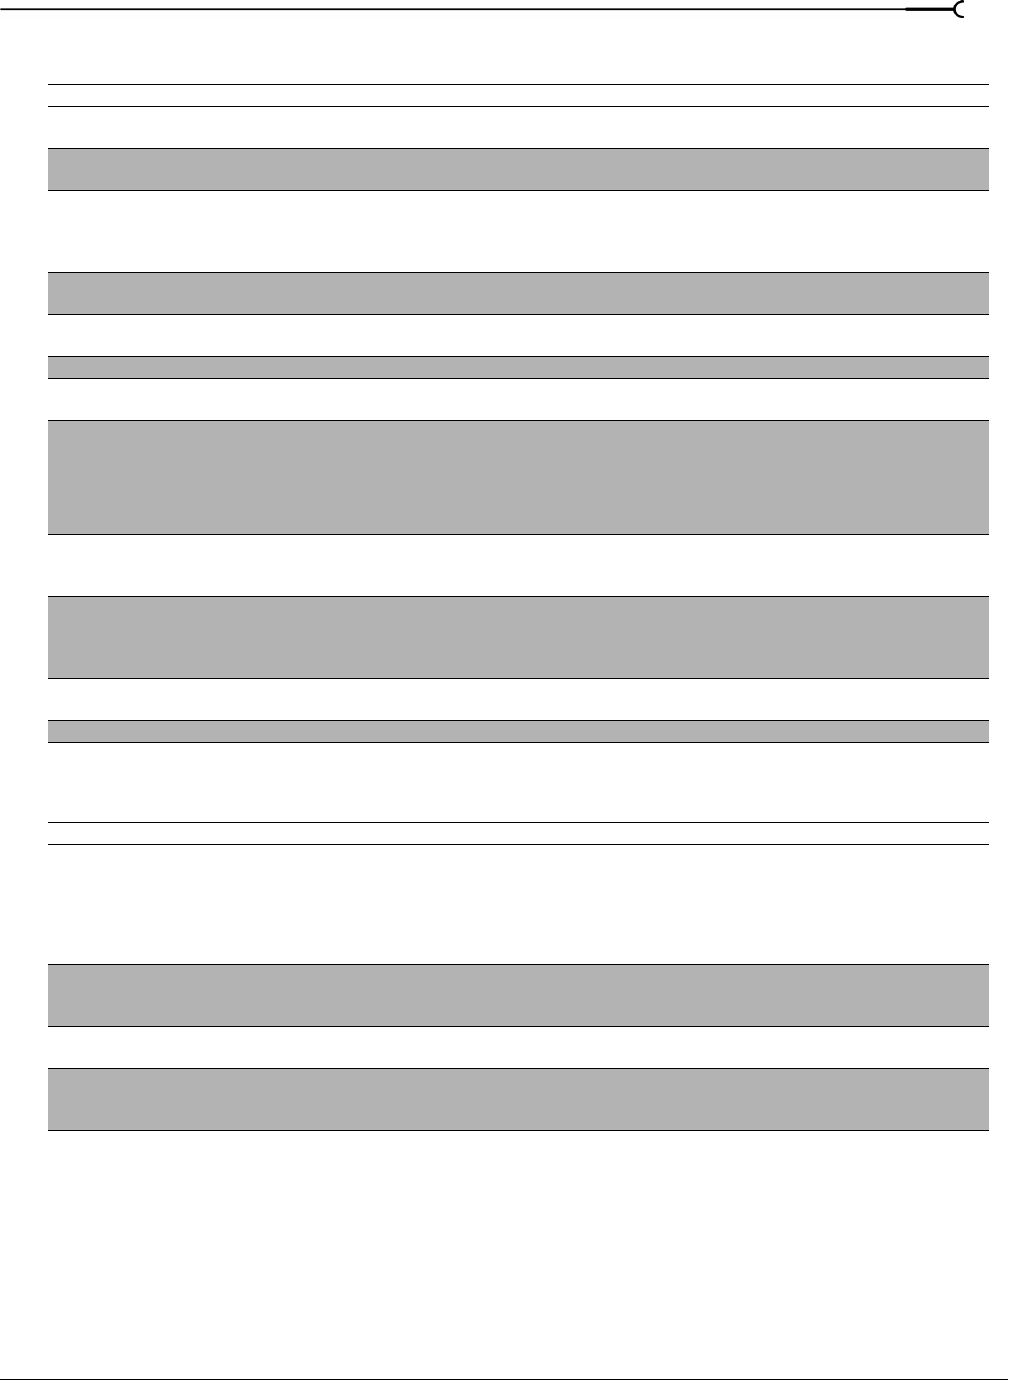
Display tab
Preference Description
Enable looping on events by
default
Sets events that are trimmed longer than their source media to automatically loop. When this option is not
selected, extended events repeat the final frame of a video file.
Preserve pitch when stretching
audio events
Prevents pitch shifting when you stretch an audio event.
Collapse loop region when no
time selection is present
When selected, a loop region does not persist when there is no time selection. This means that when you click
the timeline and move the cursor (destroying the any previous time selection), the loop region is also reset to
zero. By default, this option is not selected and loop regions persist until modified or until a new time selection
is created.
JKL/shuttle speed Choose a setting from the drop-down list to set the speed that will be used for scrubbing the timeline with the
JKL keys or with a multimedia controller.
Quick fade length for audio
events (ms)
Sets a fast fade on the edges of audio events (10ms by default) to soften potentially harsh beginnings and
endings.
New still image length (seconds) Sets the default duration of inserted still image files (e.g., BMP, PNG).
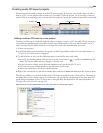
Default time between CD tracks Sets the default time created between CD tracks when using the Add Media as CD Tracks command in the
Project Media window. For more information, see Adding media as CD tracks to a new project on page 353.
Cursor preview duration
(seconds)
Enter a value in the edit box to specify the length of the time Vegas software will preview when you preview the
cursor.
To preview the cursor, press the 0 key on the numeric keypad. Vegas software creates a temporary selection
(centered over the cursor) and begins playback automatically.
Cursor preview will loop if the Loop Playback mode is enabled.
Automatically overlap multiple
selected media when added
Creates automatic crossfades between events when multiple media files are added to the same track across
time. When this check box is not selected, multiple media files are added end-to-end across time with no
overlap. For more information, see Creating a slide show on page 227.
Cut to overlap conversion Sets the behavior of the cut-to-overlap feature. The cut-to-overlap feature allows you to transform a cut from
one event to another into a transition. The Amount field sets the duration of the extended overlap. The
Alignment value determines the direction of the extension. For more information, see Converting a cut to a
transition on page 271.
Envelope fade types Sets the default fade curves for event, track, and bus track envelopes. You can choose separate fade types for
audio and video envelopes. For more information, see Changing an event’s fade curve on page 176.
Default All Restores all editing preferences to the default settings.
Preference Description
Track colors Use these controls to change the default colors used to display tracks in your project.
Select a track from the Track drop-down list, and then click the color swatch to display a color picker.
You can choose any color using the RGBA or HSLA controls, or click the eyedropper to sample a color from your
screen.
When you click OK or Apply, all tracks that used the selected color are updated.
Envelope Colors Choose an envelope type from the Envelope color preference for drop-down list and click the color swatch to
display a color picker, where you can choose any color using the RGBA or HSLA controls, or click the
eyedropper to sample a color from your screen.
Icon color saturation Drag the slider to adjust the color intensity of icons in the Vegas window. Drag to the left to decrease the color
saturation, or drag to the right to increase it.
Icon color tint Drag the slider to adjust the amount of tinting that is applied to the icons in the Vegas window. Drag the slider
to the right to add an average of the title bar colors to the icons. Drag to the left to decrease the amount of
tinting applied.