


306
SAVING, RENDERING, AND PRINTING PROJECTS CHP. 17
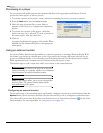
Creating a copy of a project (using Save As...)
After you have been working with your project, you can use the Save As command in the File menu to create
a copy of the small project file with a different name. Since multimedia projects can be very complex, and
since Vegas project files are so small, saving a number of different versions of a project is a low-risk way to try
new techniques.
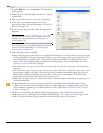
1.
From the File menu, choose Save As. The Save As dialog appears.
2.
Select the drive and folder where you want to store the project.
3.
Type a new name in the File name box.
4.
Click the Save button on the Save As dialog.
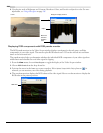
Saving a project with media
The option of saving both the project file (VEG) and the media files to a common location is also provided.
You can choose to save all media files along with the project file or allow Vegas software to consolidate and
trim the media for you. With this second option, media storage is optimized by saving only those portions of
files that are used in the project and by eliminating unused takes.
Note:
Peak files (.sfk) and audio proxy files (.sfap0) are not
saved with the project when
Copy and trim media with project
is selected. Because these files can regenerate as needed, they
do not need to be archived. For more information, see Peak
File (.sfk) on page 383 or Audio proxy files (.sfap0) on page
371.
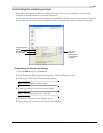
1.
From the File menu, choose Save As. The Save As dialog appears.
2.
Select the drive and folder where you want to store the project.
3.
Type the project name in the File name box.
4.
Select the Copy and trim media with project check box.
5.
Click Save. The Copy Media Options dialog appears.
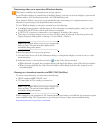
6.
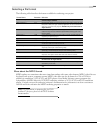
Select the appropriate option:
• Select the Copy all media radio button to copy all media files to the
same location as the Vegas project file.
• Select the Create trimmed copies of source media radio button to
optimize media storage by saving only those portions of media files
used in events and discarding unused takes. Audio files are saved as
Wave format if under 2 GB (as Wave64 if over 2 GB) and DV
video is saved as AVI. Non-DV video files are copied in full.
Enter an Extra head and tail (seconds) value to indicate how much time should be included before and after
the trimmed media. For example, if the project contains a 2-minute media file, but the event on the
timeline for that file lasts only from 1:00 to 1:20, you could enter 5 seconds in the
Extra Head and Tail box
to have the media file saved from 0:55 to 1:25 (5 seconds added to the head and tail of the event).
Including this extra material allows space for future edits.
7.
Click OK. The project file is saved and the related media files to the location you specified.