


CHP. 13 USING ADVANCED VIDEO FEATURES
237
Tips:
If you don’t want to convert all clips in their entirety,
create regions to indicate the portions of the captured HDV
clips that you want to convert to an intermediate format, and
then the Batch Render script to render the regions to the
desired format.
Remember that Vegas software supports multiple instances.
You can use one instance of the application to render your
intermediate files while you continue editing in another
instance. Use network rendering to queue multiple render
jobs.
Using DVD Architect software, you can create a DVD that
contains an SD version of your project and place an HD
Windows Media version in the Extras folder on the disk.
When you browse to the Extras folder via Windows
Explorer, you can play the HD version and output it to your
computer's display, a home theater, or a projector.
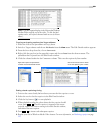
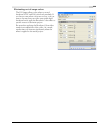
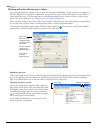
Replacing intermediate files with HDV source for HD delivery
If you’re planning to render to a format that supports high-definition video or print to an HD tape via a
Blackmagic Design Decklink™ card, replace your HDV intermediate file with the original transport stream
after you’re finished editing and before you render.
Note:
If your intermediate files were rendered using the
CineForm HD codec, you won't need to replace the
intermediate files with the transport streams.
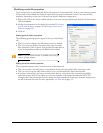
1.
Right-click the HDV intermediate file in the Project Media window.
2.
Choose Replace from the shortcut menu.
3.
Browse to the MPEG-2 transport stream that corresponds to the intermediate file, and then click Open.