


11-30
User Guide for Resource Manager Essentials 4.1
OL-11714-01
Chapter 11 Using NetShow Commands
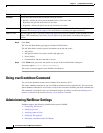
Administering NetShow Settings
To define the protocol order for NetShow:
Step 1 Select Resource Manager Essentials > Admin > Config Mgmt.
The Transport Settings dialog box appears.
Step 2 Select NetShow from the Application Name drop-down list.
Step 3 Select a protocol from the Available Protocols pane and click Add.
NetShow supports only Telnet and SSH.
If you want to remove a protocol or change the protocol order, you can remove the protocol using the
Remove button and add the protocol, again.
The protocols that you have selected appear in the Selected Protocol Order pane.
Step 4 Click Apply.
A message appears, New settings saved successfully.
Step 5 Click OK.
Note The protocol used for communicating with the device is based on the order in which the
protocols are listed here.
Setting Log Levels
You can use this option to set the log levels for NetShow.
Log files are stored at these locations:
• On Windows: NMSROOT\log, where NMSROOT is the CiscoWorks installation directory.
• On Solaris: /var/adm/CSCOpx/log
Locate the following log files for NetShow:
• NetShowServer.log
All information related to the process NetShowMgr will be logged in this file.
• NetShow_cli.log
All information related to the NetShow CLI commands will be logged in this file.
• NetShowClient.log
All other information related to NetShow will be logged in this file.
To set the log levels for NetShow:
Step 1 Select Resource Manager Essentials > Admin > System Preferences > Loglevel Settings.
The Set Application Logging Levels dialog box appears.
Step 2 Select NetShow from the Application drop-down list.
Step 3 Select the appropriate log level from the Logging Level drop-down list.
Step 4 Either: