14-16
User Guide for Resource Manager Essentials 4.1
OL-11714-01
Chapter 14 Enabling and Tracking Syslogs Using Syslog Analyzer and Collector
Configuring Devices to Send Syslogs
PIX Devices
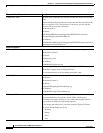
To configure PIX devices using Telnet:
Step 1 Connect to the device using Telnet and enter into the Global Configuration mode.
Step 2 Run the following commands:
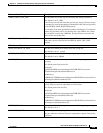
logging host CiscoWorks IP address [in_if_name] CiscoWorks IP address [protocol /port] [format
emblem
], where:
in_if_name is the interface on which the syslog server resides.
CiscoWorks IP address is the address of the CiscoWorks server.
protocol is the protocol over which the syslog message is sent; either tcp or udp. PIX Firewall only sends
TCP syslog messages to the PIX Firewall Syslog Server.
You can only view the port and protocol values you previously entered by using the write terminal
command and finding the command in the listing—the TCP protocol is listed as 6 and the UDP protocol
is listed as 17.
port is the port from which the PIX Firewall sends either UDP or TCP syslog messages. This must be
same port at which the syslog server listens.
For the UDP port, the default is 514 and the allowable range for changing the value is 1025 through
65535.
For the TCP port, the default is 1470, and the allowable range is 1025 through 65535. TCP ports only
work with the PIX Firewall Syslog Serve
r.
format emblem is the option that enables EMBLEM format logging on a per-syslog-server basis.
EMBLEM format logging is available for UDP syslog messages only and is disabled by default.
Configuring the Device Using NetConfig Syslog Task
This section details how to configure devices using the NetConfig Syslog task.
Use the job definition wizard in NetConfig to create and schedule a NetConfig job. For more details see
the
Making and Deploying Configuration Changes Using NetConfig topics.
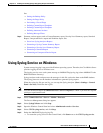
See the following procedure to launch the NetConfig application and use the NetConfig Syslog task in
a job:
Step 1 Select Resource Manager Essentials > Config Mgmt > NetConfig.
The NetConfig Job Browser appears.
Ensure that you have set the transport protocol order and password policy for your job using Resource
Manager Essentials > Admin > Config Mgmt > Archive Mgmt. See the topics
Configuring Transport
Protocols and Configuring Default Job Policies in the section, Archiving Configurations and Managing
Them Using Archive Management.
For the fields in the NetConfig Job Browser, see Starting a New NetConfig Job in the section Making
and Deploying Configuration Changes Using NetConfig.
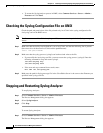
Step 2 Click Create.
The Devices and Tasks dialog box appears, with these panes:


