14-20
User Guide for Resource Manager Essentials 4.1
OL-11714-01
Chapter 14 Enabling and Tracking Syslogs Using Syslog Analyzer and Collector
Syslog Administrative Tasks
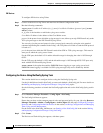
If you have clicked Save, the backup will continue to save the data even after the data has exceeded the
specified size of the backup file. However, the system will send an e-mail asking you to cleanup the
backup file.
Setting the Purge Policy
You can specify a default policy for the periodic purging of Syslog messages.
If you access a table either through immediate reports, report jobs or by any other means, the database
locks the table and therefore the table will not be successfully purged. However, during the successive
purge operations such a table will be purged.
A purge job is enabled by default, and is scheduled to run at 1:00 AM daily.
To specify your default purge policy:
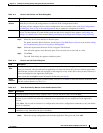
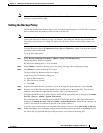
Step 1 Select Resource Manager Essentials > Admin > Syslog > Set Purge Policy.
The Purge Policy dialog box appears.
Step 2 Specify the number of days in the Purge records older than field.
Only the records older than the number of days that you specify here, will be purged. The default value
is 7 days. This is a mandatory field.
Caution You might delete data by changing these values. If you change the number of days to values lower than
the current values, messages over the new limits will be deleted.
If the data of a particular day is being accessed either through immediate reports, report jobs, or by any
other means, it will not be purged. However, during the successive purge operations this data will be
purged.
Step 3 Specify the periodicity of the purge in the Run Type field. This can be monthly, daily, or weekly.
Step 4 Select the start date using the calendar icon, to populate the date field in the dd-mmm-yyyy format (For
example, 02-Dec-2004). This is a mandatory field.
Step 5 Enter the start time in the At field, in the hh:mm:ss format (23:00:00). This is a mandatory field.
The Job Description field has a default description—Syslog Records - default purge job.
Enter the e-mail ID of the user who should be notified when the scheduled purge is complete. You can
enter more than one e-mail ID separated by commas. This is a mandatory field. Configure the SMTP
server to send e-mails in the View / Edit System Preferences dialog box (Common Services > Server >
Admin > System Preferences).
We recommend that you configure the CiscoWorks E-mail ID in the View / Edit System Preferences
dialog box (Common Services > Server > Admin > System Preferences). When the job completes, an
e-mail is sent with the CiscoWorks E-mail ID as the sender's address
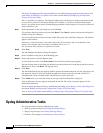
Step 6 Either click Save to save the purge policy that you have specified or Click Reset. to clear the values that
you specified and reset the defaults in the dialog box.
You can view the scheduled purge job in the Common Services JRM Job Browse (Common Services >
Server > Admin > Job Browser).


