


18-7
User Guide for Resource Manager Essentials 4.1
OL-11714-01
Chapter 18 Working With Contract Connection
Scheduling Jobs
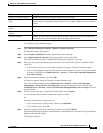
Step 6 Enter the name of the device in the Device Names field and click Select.
You can enter more than one name; separate the names by commas.
Or
Select the required device from the list tree.
• To see only the devices that you have selected, click Selection.
• To see all the devices, click All.
Step 7 Select the required contract from the Select Contracts list.
Step 8 Select the frequency of job scheduling - Immediate, Once, Weekly or Monthly from the Run Type drop
down list box.
The date and time are enabled only if you have selected an option other than Immediate in the Run Type
field.
Step 9 Click on the calendar icon and select the start date.
Step 10 Select the hours and minutes from the drop-down lists.
Step 11 Enter a description for the job you are scheduling in the Job Description field.
This is a mandatory field, if you have selected Immediate, Once, Weekly or Monthly from the Run Type
drop-down list box.
Step 12 Enter your E-mail ID in the E-mail field if you want to be notified when a job is executed.
The mail informs you whether the job was executed successfully or was a failure. You can enter multiple
E-mail IDs, separated by commas.
Step 13 Click Finish.
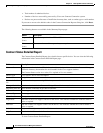
A message appears confirming the creation of the job with the Job ID. This message also informs you
how you can view the job status from Reports
> Report Jobs. For example, Job 1018 was created
successfully. Go to Reports > Report Jobs to view the status of the job
.
Step 14 Click OK.
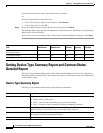
Viewing Job Status
To view the status of a job:
Step 1 Select RME > Reports > Report Jobs.
A window appears in the Report Job Browser page. It displays:
• Job ID
• Job Type
• Report Type
• Status
• Description
• Owner
• Schedule Type