


18-6
User Guide for Resource Manager Essentials 4.1
OL-11714-01
Chapter 18 Working With Contract Connection
Scheduling Jobs
Note If the Contract Status Detailed Report page shows no records, press F5 to refresh the page and get the
results.
Scheduling Jobs
You can schedule report generation using the Schedule Job option. The job schedule can be Immediate,
Once, Weekly or Monthly.
• If you want an Immediate report select the Immediate option.
• If you want reports Once, Weekly or Monthly, specify the time and date on which you want to enable
the report collection job.
After the job runs, the status appears in the Job Browser according to the work order.
The generated report is archived separately. The Job Purge Policy is the same as for other reports. For
more details on Job Purge Policy, see the topic
Purging Reports Jobs and Archived Reports in the
Generating Reports section.
To schedule a job:
Step 1 Select Resource Manager Essentials > Reports > Report Generator.
The Report Generator page appears.
Step 2 Select Contract Connection from the drop-down list box on the left.
Step 3 Select Report Based on Contract from the drop-down list box on the right.
The Cisco.com Profile dialog box appears as a pop-up.
Step 4 Enter your Cisco.com username and password in the Cisco.com and Proxy Server Credentials Profile
dialog box.
• You must have valid Cisco.com account credentials to generate Contract Connection reports.
• You are also prompted to enter ProxyUsername and ProxyPassword if a Proxy Server hostname/IP
and port are configured in:
Common Services > Security > Cisco.com Connection Management Proxy Server Setup
Step 5 Enter the credential information and click OK.
A dialog box appears within the Contract Connection Reports page.
Cisco.com account credentials from Common Services > Security > Cisco.com Connection
Management > Cisco.com User Account Setup and proxy username/password credentials from
Common Services > Security > Cisco.com Connection Management Proxy Server Setup will not be
used henceforth.
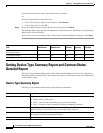
Button Description
Export to File
(Icon)
Exports the report in either PDF or CSV format.
Print
(Icon)
Generates a format of the report that you can print.