14-37
User Guide for Resource Manager Essentials 4.1
OL-11714-01
Chapter 14 Enabling and Tracking Syslogs Using Syslog Analyzer and Collector
Defining Automated Actions
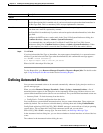
If you had selected Script in Step 9: Choose the appropriate bat file for Windows, or shell script for
Solaris, from the File Selector. For details about these files, see the topic Creating an Automated Action.
Then go to Step 10.
If you had selected URL in Step 9: Enter the URL to be invoked. If you select URL, enter the URL to
be invoked, in the URL to Invoke field of the Automated Action type dialog box. In the URL, you can
use the following parameters:
–
$D (for the device)
–
$M (for the complete syslog message).
When the URL is invoked, if you have specified $D or $M, then, $D is substituted with the device
hostname or IP address and $M is substituted with the syslog message.
For example, if the URL is
http://hostname/script.pl?device=$D&mesg=$M
When invoked, $D is replaced with 10.68.12.2 (where 10.68.12.2 is the IP address of the device) and
$M is replaced with the URL-encoded syslog message.
Step 10 Click Finish.
Also see Verifying the Automated Action.
Verifying the Automated Action
To verify the automated action:
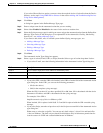
Step 1 Select a managed router that is already sending Syslog messages to the RME server and generate a
SYS-5-CONFIG_I message by changing the message-of-the-day banner as follows:
a. Connect to the managed router using Telnet and log in.
b. In enable mode enter enable, then enter a password.
c. At the config prompt enter configure terminal.
d. Change the banner by entering:
banner motd z
This is a test banner z
end
e. Exit the Telnet session.
Step 2 Make sure that the SYS-5_CONFIG_I message is sent to the CiscoWorks Server as follows:
• On UNIX systems, open the syslog_info file located in the /var/log directory, or whichever file has
been configured to receive Syslog messages.
• On Windows systems, open the syslog.log file located in the NMSROOT\log\ directory.
Where NMSROOT is the RME installation directory.
Step 3 Verify that there is a message from the managed router whose banner-of-the-day was changed.
This message appears at the bottom of the log.
• If the message is in the file, an e-mail is mailed to the e-mail ID specified.


